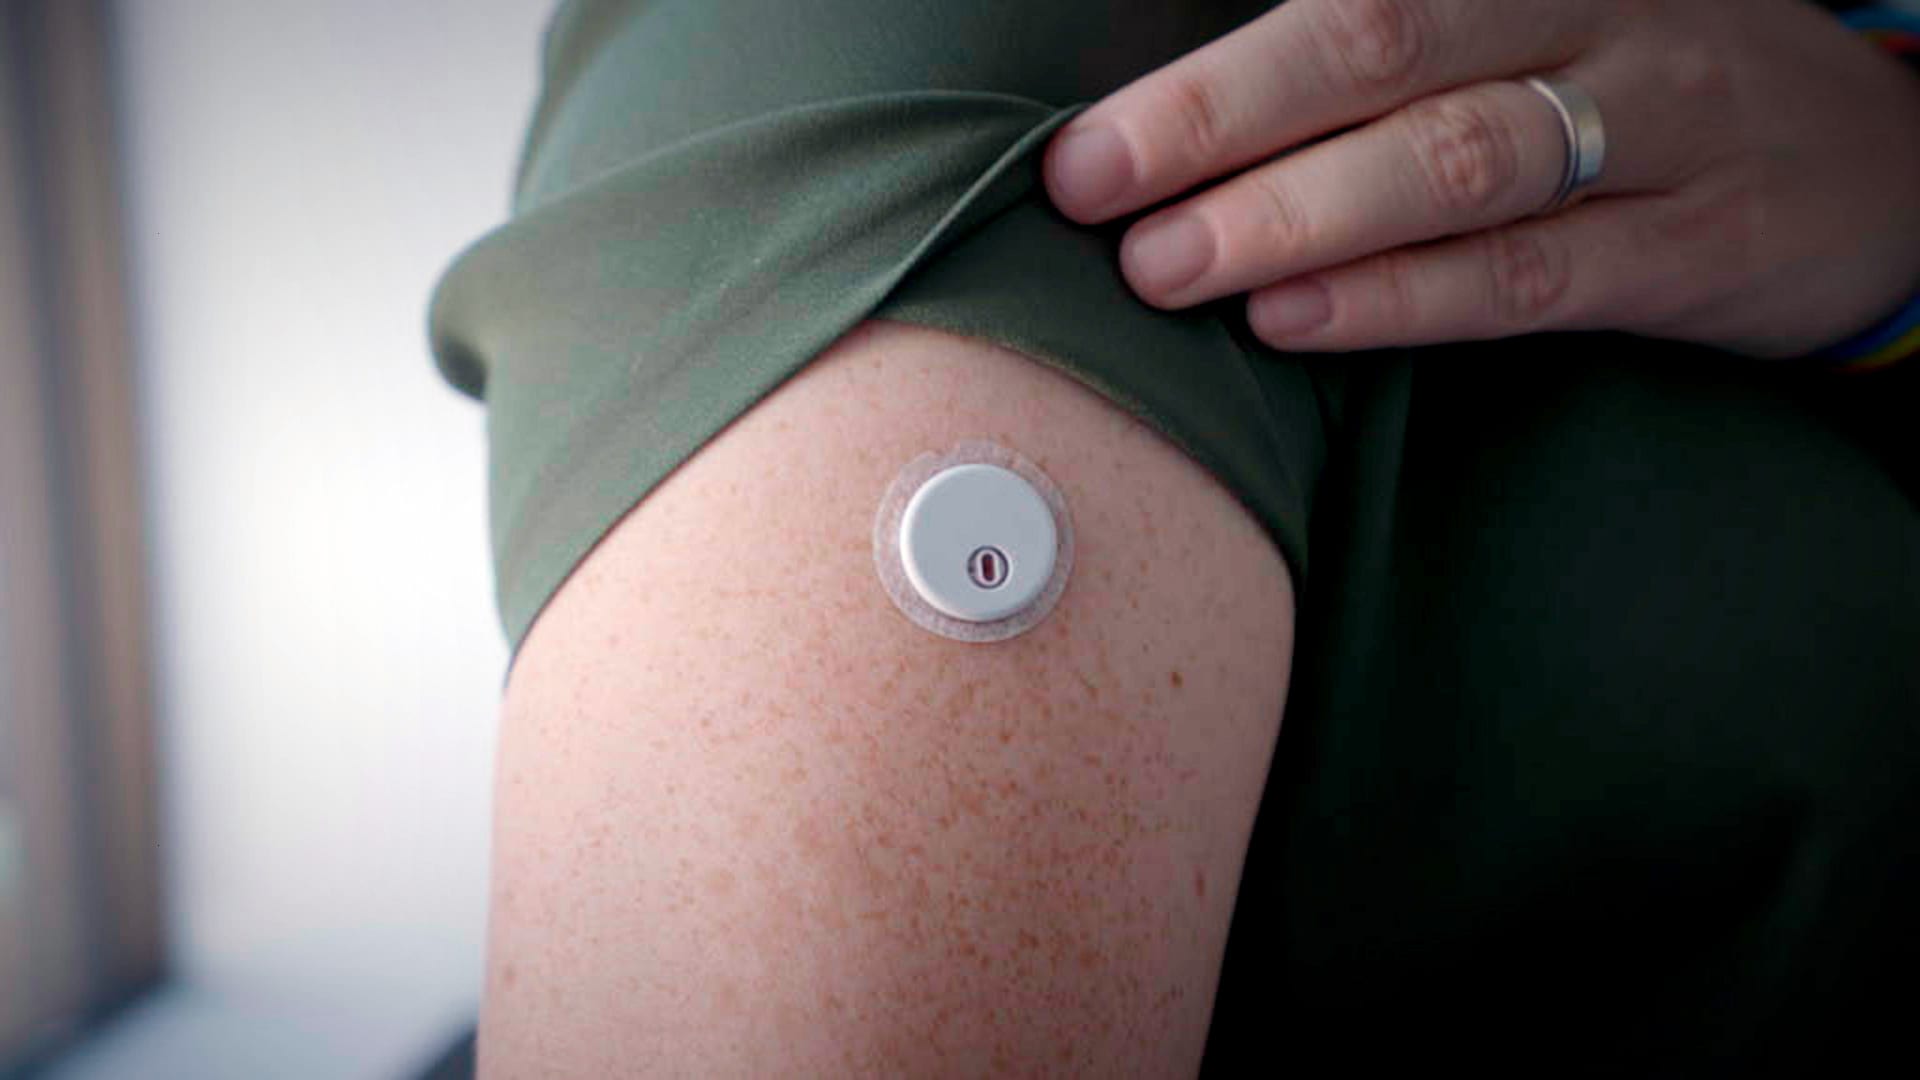
Freestyle Libre 3 Sensor Placement: Best Practices and Tips
The accurate placement of the Freestyle Libre 3 sensor is crucial for optimal performance and reliable glucose monitoring. Proper sensor placement ensures accurate readings and minimizes discomfort for the user. In this comprehensive guide, we will explore the best practices and tips for Freestyle Libre 3 sensor placement, empowering individuals with diabetes to make informed decisions about their diabetes management.
Understanding the Importance of Sensor Placement
The sensor is the heart of the Freestyle Libre 3 system, continuously measuring glucose levels in the interstitial fluid. Proper sensor placement ensures that the sensor can accurately capture glucose readings and transmit data to the reader or compatible mobile device. Additionally, optimal sensor placement can minimize the risk of skin irritation and ensure a comfortable experience for the user.
Getting Started with Freestyle Libre 3 Sensor Placement
Introduction to the Freestyle Libre 3 Sensor
Before discussing sensor placement, it’s essential to understand the components of the Freestyle Libre 3 system. The sensor is a small, discreet device that is worn on the back of the upper arm. It features a tiny, flexible filament that is inserted just beneath the skin to measure glucose levels in the interstitial fluid.
Key Features of the Freestyle Libre 3 Sensor
The Freestyle Libre 3 sensor offers several key features that make it a popular choice among individuals with diabetes:
- Continuous Glucose Monitoring: The sensor provides continuous glucose readings without the need for fingerstick tests.
- Long-Term Wear: Each sensor can be worn for up to 14 days, providing uninterrupted monitoring.
- Water Resistance: The sensor is water-resistant, allowing users to wear it while swimming, showering, or exercising.
Best Practices for Freestyle Libre 3 Sensor Placement
Choosing the Right Site
Selecting the optimal site for sensor placement is the first step in ensuring accurate readings and user comfort. The back of the upper arm is the recommended site for sensor placement, as it offers a large, relatively flat area with minimal nerve endings and blood vessels. Avoid areas with prominent veins, muscles, or bones, as these can affect sensor performance and user comfort.
Preparing the Skin
Before applying the sensor, cleaning and drying the skin thoroughly is essential to remove any dirt, oil, or residue that could interfere with adhesion. Use a gentle cleanser and water to wash the area, then pat it dry with a clean towel. Avoid using lotions, oils, or moisturizers on the skin, as these can create a barrier that prevents the sensor from adhering properly.
Applying the Sensor
When applying the sensor, follow these steps for optimal placement:
- Peel Back the Adhesive: Remove the adhesive backing from the sensor to expose the adhesive surface.
- Position the Sensor: Place the sensor on the back of the upper arm, ensuring that the filament is facing downward and the adhesive surface is in contact with the skin.
- Press Firmly: Press firmly on the sensor to ensure good adhesion to the skin. Hold the sensor in place for a few seconds to allow the adhesive to bond securely.
Securing the Sensor
After applying the sensor, securing it in place is essential to prevent accidental dislodgement or loss. Use the provided sensor adhesive or a medical tape to secure the sensor to the skin. Avoid using adhesive products that contain latex, as these can cause skin irritation in some individuals.
Tips for Ensuring Proper Freestyle Libre 3 Sensor Placement
Rotate Sensor Sites
To prevent skin irritation and ensure optimal sensor performance, it’s essential to rotate sensor sites with each new sensor placement. Alternate between the left and right arms and vary the placement within each arm to allow the skin time to heal between sensor applications.
Monitor Sensor Adhesion
Check the sensor regularly to ensure it remains securely attached to the skin. If the sensor starts to lift or peel away from the skin, reinforce it with additional adhesive or medical tape. Avoid reapplying the sensor to the same site if it becomes loose or dislodged, as this can increase the risk of skin irritation.
Stay Hydrated
Staying hydrated can help improve sensor adhesion and minimize the risk of skin irritation. Drink plenty of water throughout the day to keep the skin hydrated and supple, enhancing adhesive performance and ensuring a comfortable sensor experience.
Troubleshooting Sensor Placement Issues
Addressing Skin Irritation
If you experience skin irritation or discomfort from sensor placement, try the following:
- Remove the Sensor: If irritation persists, remove the sensor and allow the skin to heal before applying a new sensor to a different site.
- Use Barrier Products: To reduce friction and irritation, apply a skin barrier product, such as a protective barrier film or hydrocolloid dressing, to the skin before sensor placement.
Improving Adhesion
If you have trouble with sensor adhesion, try the following:
- Clean the Skin Thoroughly: Ensure the skin is clean and dry before applying the sensor to improve adhesion.
- Use Adhesive Enhancers: Apply an adhesive enhancer or skin prep solution to the skin before sensor placement to enhance adhesion and prolong wear time.
Conclusion
Proper sensor placement is essential for maximizing the accuracy, comfort, and longevity of the Freestyle Libre 3 sensor. By following the best practices and tips outlined in this guide, individuals with diabetes can ensure optimal sensor placement and enjoy reliable glucose monitoring without compromising their comfort or well-being. Remember to rotate sensor sites regularly, monitor sensor adhesion, and address any issues promptly to maintain optimal sensor performance and user satisfaction.


